Step 4: AxeOS Setup
-
Once connected, a web page should automatically open for setup. If it doesn't, manually visit msftconnecttest.com.Or visit http://192.168.4.1.
-
In AxeOS, navigate to 'Settings'.
-
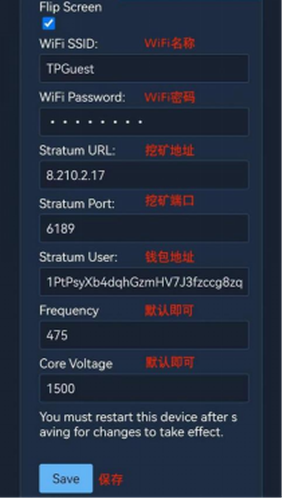
Enter your Wi-Fi details:
-
Wi-Fi ID: Enter your 2.4G Wi-Fi SSID. (Contact your internet provider if unsure about your Wi-Fi frequency).
-
Wi-Fi Password: Ensure accuracy to avoid connection issues.
Step 5: Customizing Your Miner
-
Stratum User: Change this to your username to receive mining rewards.
-
Stratum URL: Enter the URL of any bitcoin pool supporting your mining. Do not include 'TCP://' in the URL.
Step 6: Save your setting and start your mining trip
Step 7: Go into the setting page or home page
Select the "Bitaxe_****" network from your WiFi list.
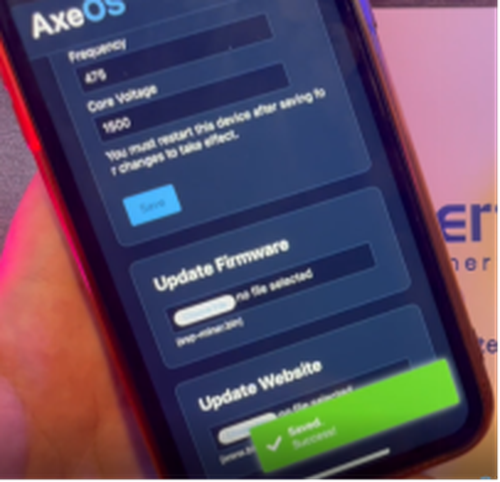
Upgrading The AxeOS Firmware
You can find the files here: https://github.com/skot/ESP-Miner/releases.
Download both the www.bin and esp-miner.bin files. In axeOS, you'll see two labeled buttons on the settings page for uploading these files.
Simply upload both of them.
More Open Source
https://www.bitaxe.org/

 Favorites
 History
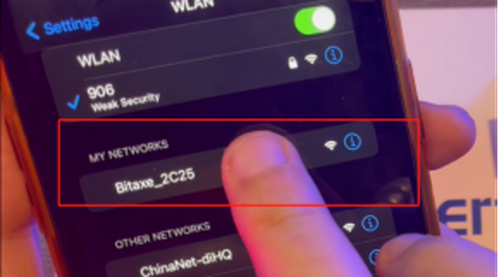

 64818.86USD
 45.19USD
 1924.26USD
 0.03USD
 6.78USD
 585.74USD
 0.02USD
 74.31USD
 0.04USD
 1.08USD
 0.07USD